Getting Started
Nextform helps you collect and organize forms W-9, W-8BEN, and W-8BEN-E. This guide will walk you through requesting a tax form via email. Our forms work great on both desktop and mobile browsers. If you need a more advanced integration, Nexform also provides a comprehensive API.
Step 1: Create an Account
Sign up for a free account. No credit card is required, and you’ll get 20 free forms to test things out. If you would like to receive email notifications when you receive a form, navigate to the organization settings page and add an email address for notifications.
Step 2: Create a Contact
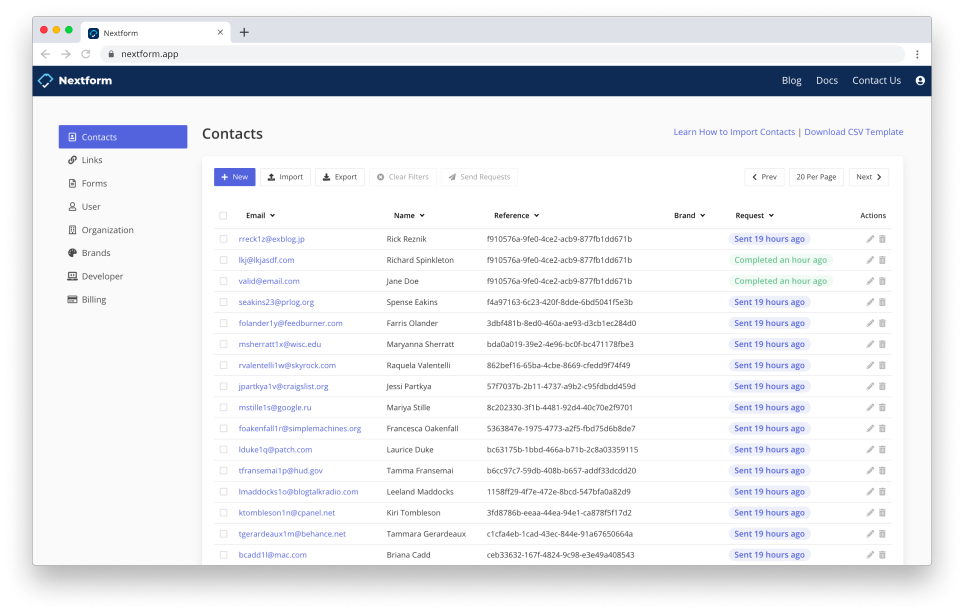
Navigate to the contacts page, click the New Contact button, and enter an email address (for testing purposes, you may want to use your own email address). No email will be sent to the contact until you create a request in the next step.


If you would like to import multiple contacts from your CRM, ERP, accounting software, or some other system, you can do so by clicking the Import button. Learn more about importing contacts here.
Step 3: Send Requests
Select the contact(s) you would like to send a form to, click the Send Requests button, and choose the type of form you would like to request. This will generate an email that instructs the recipient to click on a link and complete the form.
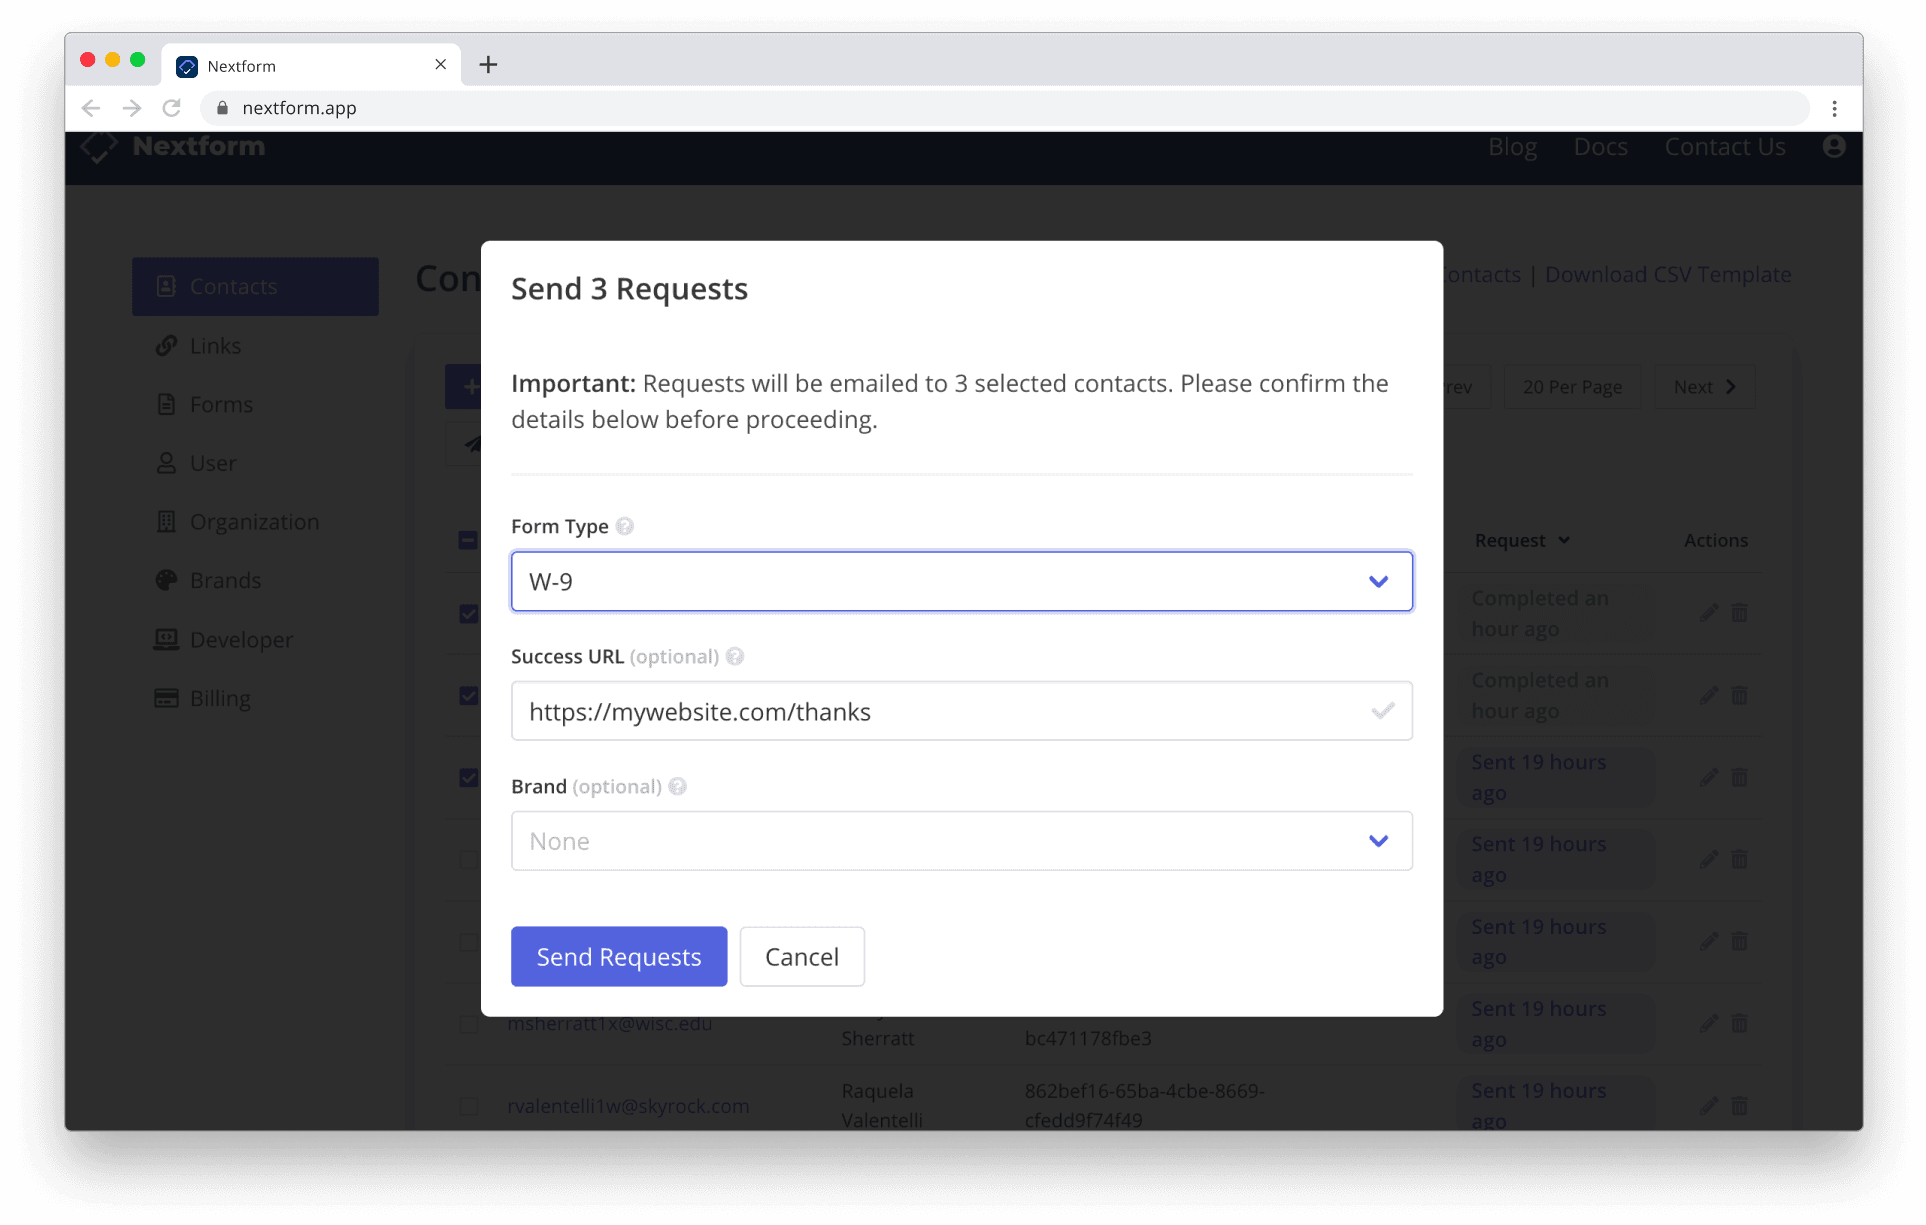
If you set the form type to Automatic, Nextform will present your contact with a short questionnaire that will direct them to the correct tax form based on their answers. This can be helpful in situations where you do not know if your contact is an individual or entity, or if they reside in the United States or not.
When a form is completed, Nextform will display a PDF of the completed form by default. If you would rather redirect your contact to your own website, you can set the Success URL to the desired address.
Step 3: Monitor Progress
After creating a request, you will be able to see the status of that request next to your contact. There are four possible statuses:
- Sent - The request has been sent to the contact.
- Viewed - The contact has clicked on the link and viewed the form.
- Bounced - The email address is invalid or the email was rejected by the recipient.
- Completed - The contact has completed the form.
If you sent a test request to yourself, open your email to view the request. Follow the link and fill in the form. Once you complete a form, you will be redirected to the success URL and the request status will change to completed. To browse completed forms, visit the forms page where you can search by name, email address, and more. You can easily view and download an official PDF of the form, and you can export a CSV file with all your data by clicking the Export button.
Nice work! If you would like to add your company name and logo to the forms, upgrade to a monthly or yearly subscription.
Next Steps
- Unlock unlimited forms with a monthly or yearly subscription.
- If you need more forms for testing, please contact us.
- Check out our API and webhooks if you need a more advanced integration.